
GraphQL is a modern query language built by Facebook for requesting and fetching data from your API servers. It provides a simple way to view and organize your data and is characterized by nice and easy-to-use documentation, type validation, and built-in support for data aggregation from multiple services.
Behind the scenes, GraphQL can proxy existing RESTful APIs or implement new queries and mutations independently, allowing gradual migration from old endpoints to new ones.
While GraphQL provides significant advantages over RESTful APIs, it requires some planning skills to create your primary GraphQL schema. Many nuances, such as input types vs. interfaces or limitations when using union types, mean that this process can take longer than expected. If you’re looking for a quick way to iterate with your schema, creating a mockup server can save you hours and even days, allowing you to use your server even before you implement it with real data.
Because a GraphQL schema defines all of the types and responses of your server, a mockup server can run instantly using only your GraphQL schema. Each query will respond with dummy data as if it came from your servers, following all the defined types and data structures. If you don’t want to write code or spin up some servers, Neuledge lets you import, edit, and serve your GraphQL schema in the cloud.
Step 1: Creating a GraphQL workspace
Neuledge provides you with several options for creating a new workspace for your project. You can choose to either start and write your schema from scratch or import it from an existing server or schema definition.
👉 Start here: workspace.neuledge.com
Step 2: Add types on your schema
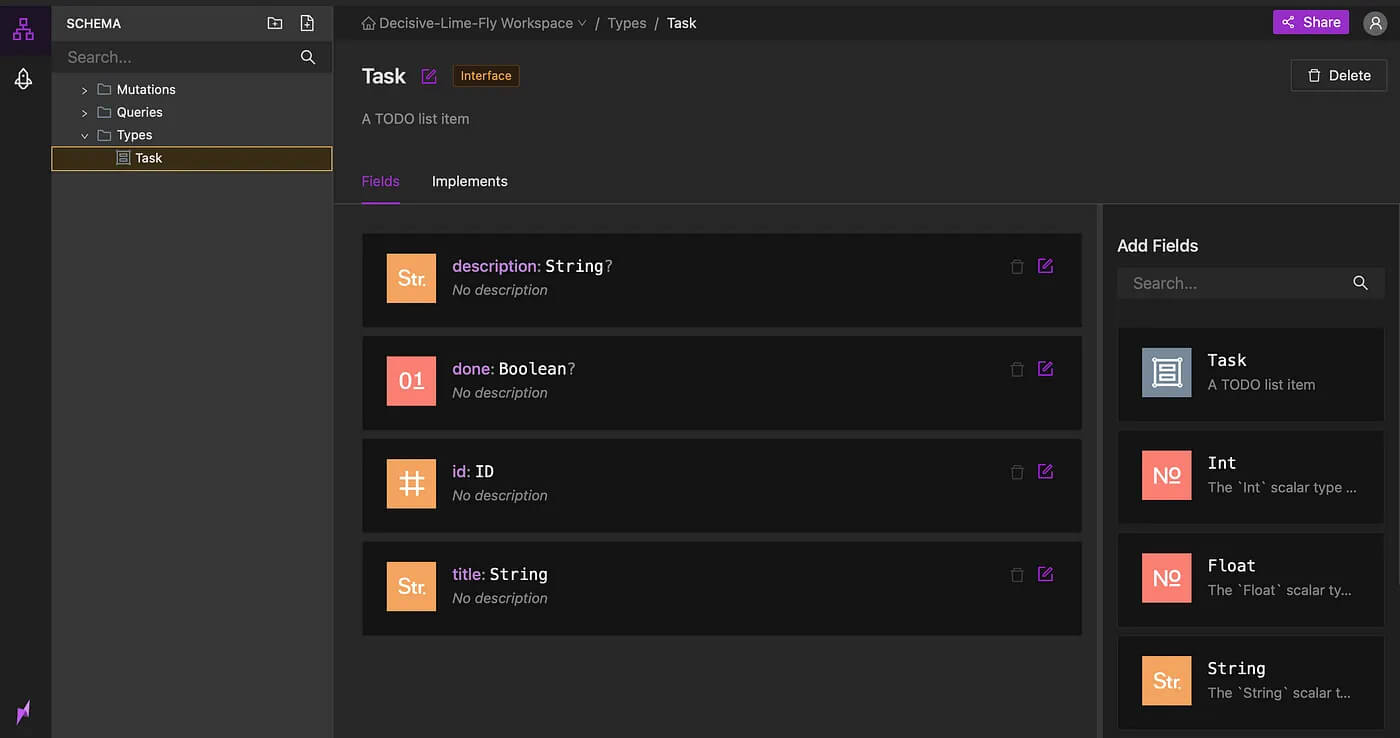
Neuledge automatically orders your schema types and operations in the folders named Queries, Mutations, and Types.
You will notice that there is no difference between input types, interfaces, or objects. Neuledge lets you define all of your data structures as interfaces and handles the conversions for GraphQL for you.
Step 3: Edit and add metadata on your types
Change your type names and properties using a drag-n-drop interface. All types are required by default; use the property dropdown to mark fields as optionals or lists:
Step 4: Add mockup data
When you are done editing your schema, switch on the menu to the “Deployments” toolbar and create a new deployment for your server. Any change you will make on the schema will update on the server within a few seconds.
Step 5: Query your mockup server
Copy the endpoint URL and open it in your browser. If you enable the playground IDE, you will see a nice UI panel that will enable you to query the server and see the schema documentation. The same endpoint URL should be used on your client’s application to query the mockup server from your apps.
I hope you will find this tutorial useful. We are planning to release many more features to Neuledge, including improving the schema editor and even logic layers with real data. Fill out our questionnaire on our website to stay tuned.
Please let me know in the comments below if there is anything you would like to see in the next versions. Cheers! 🍻


